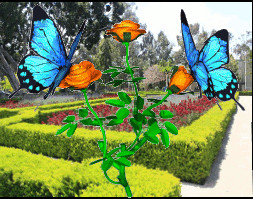
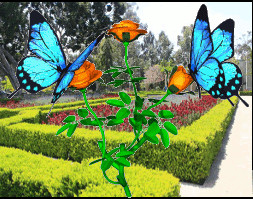
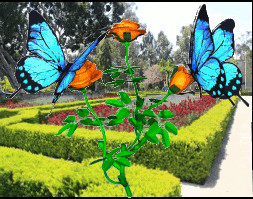
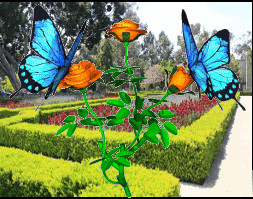
Tag Archives: GIMP

“imageObjects” and Some Uses for Them

What I call an “Image Object” is a png file with a transparent background and containing only one subject, such as an isolated person.

Here is an example:

Click image for larger view

gimp4

This was made in GIMP by the following method, but I imagine other editors would work as well:

Extract a single figure from an image and paste into GIMP as new image.

create a new transparent layer.

Select the background, select the figure and copy.

Select the transparent layer, paste and anchor the floating selection.

Hide the background and save the layer as a png file.

Here is something I did with the “object”:

Click image for larger view

gimp5

The figure on the right was given perspective, which had the effect of being a 3d rotation. This can be seen by comparing the superimposed images at the bottom.

Another thing that can be done is to use “image objects” to create 3d web pages.

Here is an example:

Click image for larger view

runrs

I had to screen record and convert this to an animated gif, so the quality is reduced, but the idea is there.

here is the code:

<!DOCTYPE html PUBLIC '-//W3C//DTD XHTML 1.0 Transitional//EN' 'http://www.w3.org/TR/xhtml1/DTD/xhtml1-transitional.dtd'&gt;
<html xmlns='http://www.w3.org/1999/xhtml'&gt;
<head profile='http://gmpg.org/xfn/11'&gt;
<title>Enter Title Here</title>
<style>
body {margin-left:0;margin-right:0;font:normal normal normal 15pt Arial;background: #777777}
#i1,#i4{position: absolute; left: 20%; top: 20.5%; height: 380px}
#i4{left: 58%}
#i3{position: absolute; left: 27%; top: 31.5%; height: 380px}
#i2{position: absolute; top: 20%;  left: 15%; width: 70%}
#b1{position: absolute; left: 10%; font:normal normal normal 15pt Arial}
</style>
</head>
<body><br />
<input type=”button” id=”b1″ name=”b1″ value=”rotate” onclick=’rot();’/>
<img id=”i2″ src=”file://D:/Misc/Garden.jpg” width = “” height = “” alt = “” align=”” />
<img id=”i1″ src=”file://D:/Misc/runner1.png” width = “” height = “” alt = “” align=”” />
<img id=”i3″ src=”file://D:/Misc/runner2.png” width = “” height = “” alt = “” align=”” />
<img id=”i4″ src=”file://D:/Misc/runner1.png” width = “” height = “” alt = “” align=”” />
var j = -2; var si; var on = false;
function rot() {
if (! on) {
document.getElementById(“b1”).value = “stop”;
on = true;
} else {
on = false;
document.getElementById(“b1”).value = “rotate”;
}
if (on) {
si = setInterval(“rot1()”, 40);
} else {
clearInterval(si);
}
}function rot1() {
j++;
if (j==-1) {
document.getElementById(“i1″).style.transform=”rotateY(0deg)”;
document.getElementById(“i2″).style.transform=”rotateY(0deg)”;
document.getElementById(“i4″).style.transform=”rotateY(0deg)”;
}
if (j==0) {
document.getElementById(“i1″).style.transform=”rotateY(-4deg)”;
document.getElementById(“i2″).style.transform=”rotateY(3deg)”;
document.getElementById(“i4″).style.transform=”rotateY(-4deg)”;
}
if (j==1) {
document.getElementById(“i1″).style.transform=”rotateY(-8deg)”;
document.getElementById(“i2″).style.transform=”rotateY(6deg)”;
document.getElementById(“i3″).style.transform=”rotateY(-8deg)”;
}
if (j==2) {
document.getElementById(“i1″).style.transform=”rotateY(-12deg)”;
document.getElementById(“i2″).style.transform=”rotateY(9deg)”;
document.getElementById(“i4″).style.transform=”rotateY(-12deg)”;
}
if (j==3) {
document.getElementById(“i1″).style.transform=”rotateY(-8deg)”;
document.getElementById(“i2″).style.transform=”rotateY(6deg)”;
document.getElementById(“i4″).style.transform=”rotateY(-8deg)”;
}
if (j==4) {
document.getElementById(“i1″).style.transform=”rotateY(-4deg)”;
document.getElementById(“i2″).style.transform=”rotateY(3deg)”;
document.getElementById(“i4″).style.transform=”rotateY(-4deg)”;
}
if (j==5) {
document.getElementById(“i1″).style.transform=”rotateY(0deg)”;
document.getElementById(“i2″).style.transform=”rotateY(0deg)”;
document.getElementById(“i4″).style.transform=”rotateY(0deg)”;
};
if (j==6) {
document.getElementById(“i1″).style.transform=”rotateY(4deg)”;
document.getElementById(“i2″).style.transform=”rotateY(-3deg)”;
document.getElementById(“i4″).style.transform=”rotateY(4deg)”;
}
if (j==7) {
document.getElementById(“i1″).style.transform=”rotateY(8deg)”;
document.getElementById(“i2″).style.transform=”rotateY(-6deg)”;
document.getElementById(“i4″).style.transform=”rotateY(8deg)”;
}
if (j==8) {
document.getElementById(“i1″).style.transform=”rotateY(12deg)”;
document.getElementById(“i2″).style.transform=”rotateY(-9deg)”;
document.getElementById(“i4″).style.transform=”rotateY(12deg)”;
}
if (j==9) {
document.getElementById(“i1″).style.transform=”rotateY(8deg)”;
document.getElementById(“i2″).style.transform=”rotateY(-6deg)”;
document.getElementById(“i4″).style.transform=”rotateY(8deg)”;
}
if (j==10) {
document.getElementById(“i1″).style.transform=”rotateY(4deg)”;
document.getElementById(“i2″).style.transform=”rotateY(-3deg)”;
document.getElementById(“i4″).style.transform=”rotateY(4deg)”;
j = -2;
}
}

</body></html>

I used two objects and a background image.

The foreground object was given an oscillating Y rotation, while the background was rotated in the opposite direction. The mid figure was not given a rotation.

Also, I made the button a toggle. If it is not rotating, clicking it will start rotation and clicking a image with rotation will stop it


My Favorite Type of Optical Illusion

These, in my opinion are the most incredible optical illusions. The classic is a file of a dragon which can be downloaded and printed. After cutting and assembling, a three dimensional object is obtained. If while looking at the head you move from side to side, the head seems to be following.
If you want to download the dragon. her is the link

This led me to ask, would it be possible to create the same effect with an 3- dimensional image that did not require assembly. The answer was yes, although the effect is not as dramatic as with a 3-d object.

I had previously posted a method for creating depthmaps to convert 2D to 3D images. This uses a slight modification.

The illusion works by having the head, which would normally be convex, made concave so that it recedes. This gives the brain a false signal, since it knows heads are supposed to be convex. The result is the head is still perceived to be convex, but for some reason, always seems to be pointing derectly at you, no matter where your position.

Where a normal depthmap would have a greater luminance in the center parts of the head, these have the greater luminance at the sides of the head, creating what should be a concave head, only that is not what is viewed.

Here are some examples. Two are animated gifs, one is a red-cyan anaglyph and one is a yellow-blue anaglyph. The animated gifs can only be viewed on the screen. The anaglyphs can be printed, but require colored glasses to be viewed.

Click images for larger view

SAG-Ill Giraffe-Illusion SAGYB SAGRB

Converting Animated Clipart to 3D

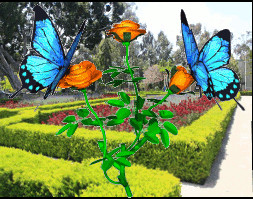
Animated GIF clipart images can often be an interesting addition to a webpage. What if the animation were also in 3d?

Here is an example:

Click image for larger view

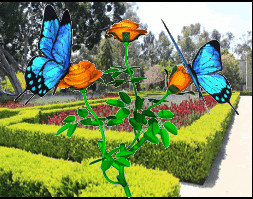
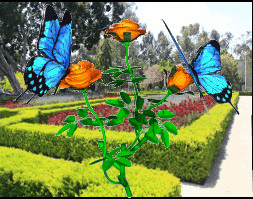
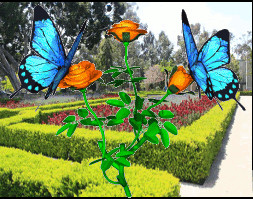
butterfly2

The procedure for the conversion has been described in a previous post.

For each frame of the original clipart, there must be two frames, one for each viewpoint. If the animation does not have a background, one must be added to each frame.  A depthmap must then be created with the animation in the foreground. As in the previous post, the depthmap must be used to create a displacement on each duplicate frame. Thus, two frames are needed for each original clipart frame.

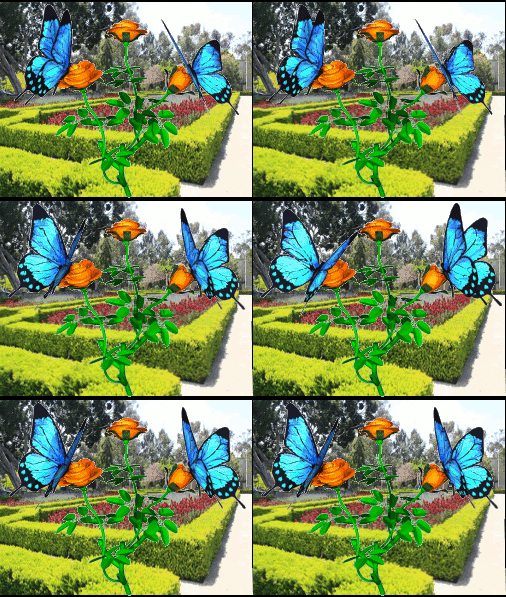
Here are the frames for the above example:

Click image for larger view

backgroundframe2frame3frame4frame5frame6frame7frame8

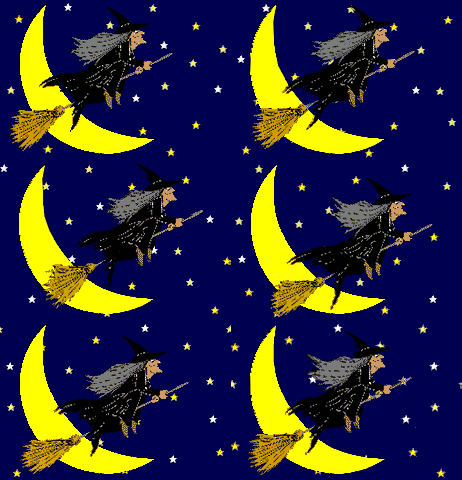
Here is another example

Click image for larger view

witch

Single Image, No Glasses, 3D Videos

In the previous post I discussed a single image, no glasses, 3d image viewer. The same technique can be used to produce 3d videos.

Below are a couple of examples:

tennis

city

The following is the code for a viewer:

<!DOCTYPE html PUBLIC ‘-//W3C//DTD XHTML 1.0 Transitional//EN’ ‘http://www.w3.org/TR/xhtml1/DTD/xhtml1-transitional.dtd’&gt;
<html xmlns=’http://www.w3.org/1999/xhtml’&gt;
<head profile=’http://gmpg.org/xfn/11′&gt;
<title>Enter Title Here</title>
<style type=’text/css’>
body {margin-left:0;margin-right:0;font:normal normal 800 18px Arial; background: black; color: white}
a{ text-decoration: none}
:link { color: rgb(255, 255, 255) }
:visited {color :rgb(255, 255,255) }
:hover { }
:active { }
img{ border: 1px solid black; height: 100%;}
#layer1 {position: absolute; top: 30%;  height: 40%; width: 100%;  padding: 0; text-align: center }
#up {position: absolute; top: 1%;  width: 2%; left: 92%; padding: 0; text-align: center}
#down {position: absolute; top: 1%;  width: 2%; left: 94%; padding: 0; text-align: center}
</style>
</head>
<body onLoad=’direct1();’>
<div id=”layer1″></div>
<div id=”up”><a href=”#2″ onclick=”bigger();”>+</div>
<div id=”down”><a href=”#2″ onclick=”smaller();”>-</div>
<script type=’text/javascript’>
document.onkeyup=resize;
pic = new Array; var cntr = 0; var tot =24;pic[1] =”left1.jpg”;
pic[2] =”right1.jpg”;
pic[3] =”left2.jpg”;
pic[4] =”right2.jpg”;
pic[5] =”left3.jpg”;
pic[6] =”right3.jpg”;
pic[7] =”left4.jpg”;
pic[8] =”right4.jpg”;
pic[9] =”left5.jpg”;
pic[10] =”right5.jpg”;
pic[11] =”left6.jpg”;
pic[12] =”right6.jpg”;
pic[13] =”left7.jpg”;
pic[14] =”right7.jpg”;
pic[15] =”left8.jpg”;
pic[16] =”right8.jpg”;
pic[17] =”left9.jpg”;
pic[18] =”right9.jpg”;
pic[19] =”left10.jpg”;
pic[20] =”right10.jpg”
pic[21] =”left11.jpg”;
pic[22] =”right11.jpg”;
pic[23] =”left12.jpg”;
pic[24] =”right12.jpg”;
pic[25] =”left13.jpg”;
pic[26] =”right13.jpg”
pic[27] =”left14.jpg”;
pic[28] =”right14.jpg”document.getElementById(‘layer1’).style.height = “40%”;
document.getElementById(‘layer1’).style.top = “30%”;
var ht =document.getElementById(‘layer1’).style.height;
var tp =document.getElementById(‘layer1’).style.top;
function direct1() {setInterval(“showslides1()”, 100); }
function showslides1 () {
cntr += 1; document.getElementById(‘layer1′).innerHTML='<Img SRC=’ + pic[cntr] + ‘ alt=” ” />’;
if (cntr == tot) {cntr = 0;}}
function resize(e) {
ht = parseInt(ht);
tp = parseInt(tp);if (e.keyCode == 40) {
ht  = (ht – 2).toString() + “%”;
tp  = (tp + 1).toString() + “%”;
} else if (e.keyCode == 38) {
ht = (ht + 2).toString() + “%”;
tp  = (tp – 1).toString() + “%”;
}
document.getElementById(‘layer1’).style.height = ht;
document.getElementById(‘layer1’).style.top = tp;
}
function bigger() {
ht = parseInt(ht);
tp = parseInt(tp);
ht = (ht + 2).toString() + “%”;
tp  = (tp – 1).toString() + “%”;
document.getElementById(‘layer1’).style.height = ht;
document.getElementById(‘layer1’).style.top = tp;
}
function smaller() {
ht = parseInt(ht);
tp = parseInt(tp);
ht = (ht – 2).toString() + “%”;
tp  = (tp + 1).toString() + “%”;
document.getElementById(‘layer1’).style.height = ht;
document.getElementById(‘layer1’).style.top = tp;
}
</script>
</body></html>


It is similar to the previous viewer, but only one cycling number is used, the total number of frames. The video size can be adjusted either with the up and down arrows or the + and – icons. The size of the picture can be adjusted to maximize the effect.

Since, I can not upload html pages to this site, the examples above are animated gifs created from the frames.

To see the viewer in practice go to this site and choose “3D Single Image Videos” from “Show Menus”.

It is also possible to make the frames into a standard video format, to be played by a multimedia player.

The 3d conversion was done with GIMP as described in the link above. It must be done frame by frame and as such, is labor intensive, making it better for generating clips to be shown on a website than for entire movies. In reality, it is no more labor intensive than producing an animated movie. The procedure is not amenable to automaton, as the depthmap for each frame must be custom made.

There might be a way to automate the effect generation.  One way would be to shoot the video in 3d with an extremely small separation between the two lenses and convert the right and left views to alternate frames. The other method would be to shoot the the video in 2d at a very high frame rate, or to shoot a panorama at a very low can rate. The frames would than be assembled 2;1, 4;3, 6:5. etc. This would be the only way to eliminate excessive jerkiness in the video. A script could possibly be written to automate the frame assembly from either of the two filming methods described.

I think a method for displaying 3d videos without the need for glasses, a special screen or to strain to fuse side by side views is a significant advance.

Animated JPEG – A Viewer for 3D Animation

Animated GIF files can be used for simulating 3D in a procedure known as wiggle of wobble 3D. However, GIF has the limitation of being restricted to a maximum of 256 colors. Sometimes this is not bad, as it gives a sort of illustrated appearance, but often you want more realism. There is also a thing called Animated PNG, which is very nice, but is supported only by Firefox, Opera and related browsers. This post describes a viewer for JPG Animation.

Let me start by saying there is no such thing as an Animated JPG file. The animation is simulated by alternately showing the left and right images, by means of javascript. I have written the code for a simple viewer. Below is the code:

<!DOCTYPE html PUBLIC ‘-//W3C//DTD XHTML 1.0 Transitional//EN’ ‘http://www.w3.org/TR/xhtml1/DTD/xhtml1-transitional.dtd’&gt;
<html xmlns=’http://www.w3.org/1999/xhtml’&gt;
<head profile=’http://gmpg.org/xfn/11′&gt;
<title>Enter Title Here</title>
<style type=’text/css’>
body {margin-left:0;margin-right:0;font:normal normal 800 18px Arial; background: black; color: white}
a{ text-decoration: none}
:link { color: rgb(255, 255, 255) }
:visited {color :rgb(255, 255,255) }
:hover { }
:active { }
img{ border: 1px solid black; height: 100%;}
#layer1 {position: absolute; top: 5%;  height: 90%; width: 100%;  padding: 0; text-align: center }
#next {position: absolute; top: 1%;  width: 2%;  left: 98%; padding: 0; text-align: center}
#back {position: absolute; top: 1%;  width: 2%; left: 96%; padding: 0; text-align: center}
#up {position: absolute; top: 1%;  width: 2%; left: 92%; padding: 0; text-align: center}
#down {position: absolute; top: 1%;  width: 2%; left: 94%; padding: 0; text-align: center}
</style>
</head>
<body onLoad=’direct1();’>
<div id=”layer1″></div>
<div id=”next”><a href=”#2″ onclick=”toNext();”>></div>
<div id=”back”><a href=”#2″ onclick=”goBack();”><</div>
<div id=”up”><a href=”#2″ onclick=”bigger();”>+</div>
<div id=”down”><a href=”#2″ onclick=”smaller();”>-</div>
<script type=’text/javascript’>
document.onkeyup=resize;
pic = new Array; var cntr = 0; var tot =1;tot += 1;pic[1] =”left.jpg”;
pic[2] =”right.jpg”;
pic[3] =”left2.jpg”;
pic[4] =”right2.jpg”;
pic[5] =”left3.jpg”;
pic[6] =”right3.jpg”;
pic[7] =”left4.jpg”;
pic[8] =”right4.jpg”;
pic[9] =”left5.jpg”;
pic[10] =”right5.jpg”;
var total = 10;
document.getElementById(‘layer1’).style.height = “90%”;
document.getElementById(‘layer1’).style.top = “5%”;
var ht =document.getElementById(‘layer1’).style.height;
var tp =document.getElementById(‘layer1’).style.top;
function direct1() {setInterval(“showslides1()”, 30); }
function showslides1 () {
cntr += 1; document.getElementById(‘layer1′).innerHTML='<Img SRC=’ + pic[cntr] + ‘ alt=” ” />’;
if (cntr == tot) {cntr -=2;}}
function resize(e) {
ht = parseInt(ht);
tp = parseInt(tp);if (e.keyCode == 39) {
cntr += 2;
tot += 2;
if (tot > total) {
cntr = 0;
tot = 2;
}
} else if (e.keyCode == 37) {
cntr -= 2;
tot -= 2;
if (cntr < 0) {
cntr = total – 2;
tot = total;
}
}if (e.keyCode == 40) {
ht  = (ht – 2).toString() + “%”;
tp  = (tp + 1).toString() + “%”;
} else if (e.keyCode == 38) {
ht = (ht + 2).toString() + “%”;
tp  = (tp – 1).toString() + “%”;
}
document.getElementById(‘layer1’).style.height = ht;
document.getElementById(‘layer1’).style.top = tp;
}
function toNext() {
cntr += 2;
tot += 2;
if (tot > total) {
cntr = 0;
tot = 2;
}
}
function goBack() {
cntr -= 2;
tot -= 2;
if (cntr < 0) {
cntr = total – 2;
tot = total;
}
}
function bigger() {
ht = parseInt(ht);
tp = parseInt(tp);
ht = (ht + 2).toString() + “%”;
tp  = (tp – 1).toString() + “%”;
document.getElementById(‘layer1’).style.height = ht;
document.getElementById(‘layer1’).style.top = tp;
}
function smaller() {
ht = parseInt(ht);
tp = parseInt(tp);
ht = (ht – 2).toString() + “%”;
tp  = (tp + 1).toString() + “%”;
document.getElementById(‘layer1’).style.height = ht;
document.getElementById(‘layer1’).style.top = tp;
}
</script>
</body></html>


An array of left and right views is created:
pic[1] =”left.jpg”;
pic[2] =”right.jpg”;
pic[3] =”left2.jpg”;
pic[4] =”right2.jpg”;
pic[5] =”left3.jpg”;
pic[6] =”right3.jpg”;
pic[7] =”left4.jpg”;
pic[8] =”right4.jpg”;
pic[9] =”left5.jpg”;
pic[10] =”right5.jpg”;
and a variable, total is created with the number of the highest array index:
var total = 10;

A function  direct1() calls another function  showslides1 () at 30 millisecond intervals.

function direct1() {setInterval(“showslides1()”, 30); }

The contents of a division are dynamically replaced with the images:

document.getElementById(‘layer1′).innerHTML='<Img SRC=’ + pic[cntr] + ‘ alt=” ” />’;

cntr is an incremented variable which determines the index of the image array to be displayed. Another variable, tot  sets that one right and left pair of images at a time is shown:

if (cntr == tot) {cntr -=2;}

The picture displayed can be cycled with the right and left keys:

document.onkeyup=resize;

if (e.keyCode == 39) {
cntr += 2;
tot += 2;
if (tot > total) {
cntr = 0;
tot = 2;
}
} else if (e.keyCode == 37) {
cntr -= 2;
tot -= 2;
if (cntr < 0) {
cntr = total – 2;
tot = total;
}
}

If you go past the last set of images, the images are recycled, either up or down.

For mobile devices without a keyboard, a control panel in the upper right corner has right and left arrows to do the same thing.

The up and down keys enlarge or reduce the image:

if (e.keyCode == 40) {
ht  = (ht – 2).toString() + “%”;
tp  = (tp + 1).toString() + “%”;
} else if (e.keyCode == 38) {
ht = (ht + 2).toString() + “%”;
tp  = (tp – 1).toString() + “%”;
}
document.getElementById(‘layer1’).style.height = ht;
document.getElementById(‘layer1’).style.top = tp;
}

This is reproduced in mobile devices with the + and – symbols.

If you want to see it in action, go to this link , click on “Show Menus” and choose “3D Animated JPEG”.

If want to try it, copy the code, create a html file and include the following stereo pairs in the same folder. It will be necessary to rename the downloaded files:

Click images for larger view and save to add to viewer

left right

left3 right3

left7

right7

left8

right8

left9

right9

These stereo pairs are simulated with the procedure described in an earlier post link . I find this works better than using an actual photographed stereo pair. Using GIMP, I created a depth map and used the displace filter with settings of 0 Y displacement, -1 X displacement and Smear.

Using Gradient Filters to Create DepthMaps: Convert 2D Images to 3D

I hardly consider myself a graphics artist, but I do know how to do a few things with graphics software, allowing the software to compensate for my lack of artistic talent. This post will discuss the conversion of 2D to 3D images by means of depth maps. I will be using GIMP for my conversions, as it has gradient filters particular suitable for the job, namely the shape gradients.

The first thing is to create a new layer. I then add a linear grayscale gradient to the layer. If the view seems to be receding from bottom to top, I create a vertical gradient, if it appears to recede laterally I add a horizontal gradient and I add a diagonal gradient if it recedes diagonally. Also, if there is sky at the top of the image I stop the gradient at the beginning of the sky, so it is entirely at infinite depth.

The next thing is to add a different gradient to any foreground objects. There are two ways this can be done. If the object remains mainly in the foreground, I fill it with a shape gradient. Below is an example of this:

Click image for larger view

CCLane-DM

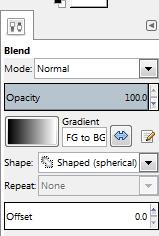
The first thing is to make the top layer transparent, so the bottom layer can be traced. If the top layer is selected the mask is placed on it, despite the tracing being done on the visible bottom layer. A  Shaped (spherical) gradient filter is then applied:

Click image for larger view

sperical

Since the object is to appear entirely in the foreground, the gradient is applied from the middle of the object laterally to well beyond the  side of the object. The gradient is applied only to the selection and therefore the edges of the object are only gray rather than black. This will make the entire object stand out in the foreground while still giving it a sense of depth, rather than something flat standing in front of the rest of the image. A Gaussian Blur is then applied to the gradient.

If the object recedes into the background, I fill it with a linear gradient. Below is an example of this:

Click for larger view

tiger3-DM

The main image has a vertical linear gradient, but the object recedes diagonally, so it is given a diagonal gradient; once again the gradient is extended well beyond the limit of the selection so the object will recede only partially into the background. Also, since the head and entire front leg should be in the foreground, they are painted in the foreground shade. Once again, a Gaussian Blur is applied.

With the depth map in place, the bottom layer is duplicated, the copy layer is moved to the top of the stack and a Displace Filter is applied to it using the depth map  as the displacement source. I choose  a negative value for the displacement, using the preview to determine the degree of displacement. There are  few artifacts created by the displacement, so they must be removed by the use of the Clone Tool.

With the the right view created, the depth map is deleted, canvas width doubled,  the right image dragged to the right half of the image and the image flattened to give the following results for a side by side image:

Click images for larger view

CCLane

tiger3

There are a couple of other ways to display the image.

An anaglyph can be created

The red channel can be removed from the upper layer by using the Curve Filter to lower the red value to zero for the entire image, giving it a cyan tint. The blue and green channels of the bottom layer can be similarly removed, giving that layer a red tint. The top layer can then be applied to the bottom layer with a Screen mode with the following results:

Click image for larger view

CCLane-ana

tiger3-ana

The anaglyph has the advantage  that it is not necessary to fuse two images, but at the sacrifice of the loss of color detail.

A wobble 3D image can also be created, by making each layer a frame of a movie and saving as an animated GIF:

Click image for larger view

CCLane-wobble

tiger3

Here is one final example of a side by side 2d to 3d conversion:

Click image for larger view

elephant