HTML Spreadsheet Update III – Sheets

What spreadsheet would be complete without the ability to have multiple sheets? This HTML Spreadsheet is no exception. Here is how it might be done:

Click image for larger view

sheets

This is the additional code that is needed:

<td id=”opn” onclick=’opn(“1″);’>Sheet1</td><td id=”opn” onclick=’opn(“2”);’>Sheet2</td>

function opn(shet) {
sht = shet
var opnstr = prompt(“Open Key”, “”) + sht;
var recovstr = localStorage.getItem(opnstr);
for (var i = 1; i <= 20; i++) {
for (var j = 1; j <=26; j++) {
a = recovstr.indexOf(“~”);
document.getElementById(String.fromCharCode(64 + j) +i).innerHTML = recovstr.substring(0, a);
recovstr = recovstr.substring(a+1);
}
}var bkopnstr = prompt(“Background Key”, “”);
var bkrecovstr = localStorage.getItem(bkopnstr);

var cnt2 = 1
for (var j = 1; j <=4; j++) {
if (j % 2 == 1 && j > 2 ) cnt2 ++;
a = bkrecovstr.indexOf(“~”);
if (j % 2 == 1)   row[cnt2] = bkrecovstr.substring(0, a);
if (j%2 == 0)  clor[cnt2]  = bkrecovstr.substring(0, a);
bkrecovstr = bkrecovstr.substring(a+1);
}

for (var i = 1; i <= 20; i++) {
for (var j = 1; j <=26; j++) {
document.getElementById(String.fromCharCode(64 + j) +row[i]).style.backgroundColor = clor[i];
}
}

}

New cells are created for the sheets and each sheet is give a number to submit to the function opn:

<td id=”opn” onclick=’opn(“1″);’>Sheet1</td><td id=”opn” onclick=’opn(“2”);’>Sheet2</td>

When the spreadsheet is saved,  each sheet is given its own key:

Click image for larger view

save-dialog

The first sheet is customized and saved by giving it a unique key. Then the visible sheet is modified for the second sheet and saved with a new key.

When time comes to open an existing sheet, the desired Sheet  cell is clicked and the key specific for that Sheet entered in the dialog, opening that particular Sheet. By clicking a different Sheet cell and entering its key, you can go back and forth from one Sheet to another.

The function opn is the same as before, only the sheet number is passed to it.

The spreadsheets shown in these posts are only templates. They can be modified in any way and saved as new files. Thus Sheet1 and Sheet2 can be replaced with specific names and more sheets can be added just by inserting their code into empty cells.

You can download the latest update  from the following source .

Click Downloads and download Spreadsheet6.zip

More Using a Mobile Device as a Race Timer – Script to Automate Finish Place Sorting

I have previously discussed a HTML file to turn a mobile device into a race timer. The way I could do that was to take the order of the finishing bib numbers and manually compare with the registration bib numbers. When a match was found, the finishing place was inserted in a new field. Sorting on that field would then place all the entries in finishing order, making the spreadsheet ready for pasting of the times. It worked, but the searching was a bit tedious.

This post will discuss a spreadsheet script to automate the finish place sorting. The script was written for LibreOffice Calc and should work equally well for the OpenOffice version. Either one is available free of charge for Windows, Mac or Linux.  They can also be run online for android  using  Chrome Browser, or ChromeOS.

The scripts will have to be customized, depending on the fields you use for your registration spreadsheet, so the code discussed will only be a model showing the basis for how to do it.

Besides being a model for a race result sorter; this post can function as a general model for sorting a spreadsheet based on the values in an unsorted column.

Here is a model for a simulated registration spreadsheet:

Click image for larger view

SS-before

The first column has the bib numbers in finishing order. This can either be entered by hand, or possibly with a bar code scanner app, automating the procedure even further. The other columns have simulations of the assigned bib number and first and last names.

Here is how the spreadsheet looks after running the script:

Click image for larger view

SS-sorted

The names are reordered to correspond to the finishing place and although it is not obvious here, the heading for the second column is changed from Bib to Place, or whatever you would want to change it to, and the finishing place is exchanged for the bib number, since the bib number is already in the first column.

Here is the code:

Sub race_results
dim my_doc as object
Dim my_sheets as object
Dim my_cell as object
Dim my_cell2 as object
Dim my_cell3 as object
Dim my_cell4 as object
Dim cell_value4 (1000) As String, cell_value6(1000) as String
Dim row As Integer, col As Integer, cell_value As Integer, cell_value2 As Integer, j As Integer, cell_value3 As String,cell_value5 As String
Dim i As Integer
cell_value6(1) = “test”
do
j = j + 1
cell_value4(j) = ThisComponent.Sheets(0).getCellByPosition(2,j).String
cell_value6(j) = ThisComponent.Sheets(0).getCellByPosition(3,j).String
loop while len(cell_value6(j)) > 0cell_value = 1
cell_value2 = 1
for row2 = 1 to 1000
if cell_value2 = 0 then exit for
cell_value = 1
for row1 = 1 to 1000
if cell_value = 0 then exit for
my_doc = ThisComponent
my_sheets = my_doc.Sheetscell_value = ThisComponent.Sheets(0).getCellByPosition(1,row1).Value
cell_value2 = ThisComponent.Sheets(0).getCellByPosition(0,row2).Value
cell_value3 = ThisComponent.Sheets(0).getCellByPosition(2,row2).String
cell_value5 = ThisComponent.Sheets(0).getCellByPosition(3,row2).Stringif cell_value = cell_value2 then
cell_value3 = cell_value4(row1)
cell_value5 = cell_value6(row1)
ThisComponent.Sheets(0).getCellByPosition(2,row2).String = cell_value3
ThisComponent.Sheets(0).getCellByPosition(3,row2).String = cell_value5
end if
next row1
next row2j = 1
do
ThisComponent.Sheets(0).getCellByPosition(1,j).Value = j
j = j + 1
loop while ThisComponent.Sheets(0).getCellByPosition(1,j).Value > 0
ThisComponent.Sheets(0).getCellByPosition(1,0).String = “Place”End Sub

variables are first declared.

Then , since they will be subsequently changed, the initial values for the variables to be sorted are placed into arrays:

Dim cell_value4 (1000) As String, cell_value6(1000) as String
do
j = j + 1
cell_value4(j) = ThisComponent.Sheets(0).getCellByPosition(2,j).String
cell_value6(j) = ThisComponent.Sheets(0).getCellByPosition(3,j).String
loop while len(cell_value6(j)) > 0

Through two loops, variables are created with the values in the cells.

my_doc = ThisComponent
my_sheets = my_doc.Sheetscell_value = ThisComponent.Sheets(0).getCellByPosition(1,row1).Value
cell_value2 = ThisComponent.Sheets(0).getCellByPosition(0,row2).Value
cell_value3 = ThisComponent.Sheets(0).getCellByPosition(2,row2).String
cell_value5 = ThisComponent.Sheets(0).getCellByPosition(3,row2).String

Then, while still looping, the bib number for each row in the first column is searched  for a match with the bib number in the second column. and the values for the other columns replaced with with the values stored in the arrays, affecting a sort.

if cell_value = cell_value2 then
cell_value3 = cell_value4(row1)
cell_value5 = cell_value6(row1)
ThisComponent.Sheets(0).getCellByPosition(2,row2).String = cell_value3
ThisComponent.Sheets(0).getCellByPosition(3,row2).String = cell_value5
end if

Finally, the heading of the second column is replaced and the bib numbers of the column replaced with the finishing order:

j = 1
do
ThisComponent.Sheets(0).getCellByPosition(1,j).Value = j
j = j + 1
loop while ThisComponent.Sheets(0).getCellByPosition(1,j).Value > 0
ThisComponent.Sheets(0).getCellByPosition(1,0).String = “Place”

To add additional fields to the sort, new arrays must be created, the initial values stored and treated as the other fields. For an age field this would be:

Dim cell_value8 (1000) As Integer  cell_value7 as Integer
do
j = j + 1
cell_value4(j) = ThisComponent.Sheets(0).getCellByPosition(2,j).String
cell_value6(j) = ThisComponent.Sheets(0).getCellByPosition(3,j).String
cell_value8(j) = ThisComponent.Sheets(0).getCellByPosition(4,j).Value
loop while len(cell_value6(j)) > 0

if cell_value = cell_value2 then
cell_value3 = cell_value4(row1)
cell_value5 = cell_value6(row1)
cell_value7 = cell_value8(row1)
ThisComponent.Sheets(0).getCellByPosition(2,row2).String = cell_value3
ThisComponent.Sheets(0).getCellByPosition(3,row2).String = cell_value5
ThisComponent.Sheets(0).getCellByPosition(4,row2).Value = cell_value7
end if

If you want to do results for two races, such as one for men and one for women, set them up in separate sheets and change the sheet index for the second race, eg.

ThisComponent.Sheets(1).getCellByPosition(3,row2).String = cell_value5

Keep in mind that the distinction between numerical and string values must be maintained or an error will result.

To create the script,  go to Tool,Macros,Organize Macros and LibreOffice Basic to get the following dialog:

Click image for larger view

dialog1


Choose edit to get the next dialog:

Click image for larger view

edit

Enter the script code and save. The script can then be run from either the edit dialog, or by choosing Tools, macros, Run Macro.

I have not tried this with an android phone yet but the online procedure through Rollapp works with a Chromebook.

An Online Color Picker

This is a simple html and javascript fille that can be added to a web page to have a popup color picker.

At first, it is only a button:

Click image for larger view

start

On clicking the button, a color picker pops up:

Click image for larger view

popup

If a color patch is clicked, the bottom row changes to the selected color and the color value is displayed, so it can be copied and pasted:

Click image for larger view

choice

On clicking the Close button, the popup disappears and it goes back to the original button.

Here is the code:

<!DOCTYPE html PUBLIC ‘-//W3C//DTD XHTML 1.0 Transitional//EN’ ‘http://www.w3.org/TR/xhtml1/DTD/xhtml1-transitional.dtd’&gt;
<html xmlns=’http://www.w3.org/1999/xhtml’&gt;
<head profile=’http://gmpg.org/xfn/11′&gt;
<title>Enter Title Here</title>
<style type=’text/css’>
body {margin-left:0;margin-right:0;font:normal normal normal 12px Arial; background: #CCCCCC}
a{ text-decoration: }
:link { color: rgb(0, 0, 255) }
:visited {color :rgb(100, 0,100) }
:hover { }
:active { }
#table1{position: relative; padding:0; border: 1px solid white; empty-cells: show; background: black; visibility: hidden  }
td{position: relative; border: 2px solid white; padding: 1px; height: 10px; width: 30px; color: white }
</style>
</head>
<body>
<center><button id=”button” name=”name” value=”ChooseColor” onclick=’showTable();’>Choose Color</button></center><br />
<table id=”table1″ align= “center”>
<tr>
<td id=”1″ style=”background: #000000″ onclick=’getColor(“1″);’> </td>
<td id=”2″ style=”background: #555555” onclick=’getColor(“2″);’> </td>
<td id=”3″ style=”background: #BBBBBB”” onclick=’getColor(“3″);’> </td>
<td id=”4″ style=”background: #FFFFFF” onclick=’getColor(“4″);’> </td>
</tr>
<tr>
<td id=”5″ style=”background: #440000” onclick=’getColor(“5″);’> </td>
<td id=”6″ style=”background: #880000” onclick=’getColor(“6″);’> </td>
<td id=”7″ style=”background: #BB0000” onclick=’getColor(“7″);’> </td>
<td id=”8″ style=”background: #FF0000” onclick=’getColor(“8″);’> </td>
</tr>
<tr>
<td id=”9″ style=”background: #004400” onclick=’getColor(“9″);’> </td>
<td id=”10″ style=”background: #008800” onclick=’getColor(“10″);’> </td>
<td id=”11″ style=”background: #00BB00” onclick=’getColor(“11″);’> </td>
<td id=”12″ style=”background: #00FF00” onclick=’getColor(“12″);’> </td>
</tr>
<td id=”13″ style=”background: #000044” onclick=’getColor(“13″);’> </td>
<td id=”14″ style=”background: #000088” onclick=’getColor(“14″);’> </td>
<td id=”15″ style=”background: #0000BB” onclick=’getColor(“15″);’> </td>
<td id=”16″ style=”background: #0000FF” onclick=’getColor(“16″);’> </td>
</tr>
<tr>
<td id=”17″ style=”background: #444400” onclick=’getColor(“17″);’> </td>
<td id=”18″ style=”background: #884400” onclick=’getColor(“18″);’> </td>
<td id=”19″ style=”background: #BB4400” onclick=’getColor(“19″);’> </td>
<td id=”20″ style=”background: #FF4400” onclick=’getColor(“20″);’> </td>
</tr>
<tr>
<td id=”21″ style=”background: #448800” onclick=’getColor(“21″);’> </td>
<td id=”22″ style=”background: #888800” onclick=’getColor(“22″);’> </td>
<td id=”23″ style=”background: #BB8800” onclick=’getColor(“23″);’> </td>
<td id=”24″ style=”background: #FF8800” onclick=’getColor(“24″);’> </td>
</tr>
<tr>
<td id=”25″ style=”background: #44BB00” onclick=’getColor(“25″);’> </td>
<td id=”26″ style=”background: #88BB00” onclick=’getColor(“26″);’> </td>
<td id=”27″ style=”background: #BBBB00” onclick=’getColor(“27″);’> </td>
<td id=”28″ style=”background: #FFBB00” onclick=’getColor(“28″);’> </td>
</tr>
<tr>
<td id=”29″ style=”background: #44FF00” onclick=’getColor(“29″);’> </td>
<td id=”30″ style=”background: #88FF00” onclick=’getColor(“30″);’> </td>
<td id=”31″ style=”background: #BBFF00” onclick=’getColor(“31″);’> </td>
<td id=”32″ style=”background: #FFFF00” onclick=’getColor(“32″);’> </td>
</tr>
<tr>
<td id=”33″ style=”background: #440044” onclick=’getColor(“33″);’> </td>
<td id=”34″ style=”background: #880044” onclick=’getColor(“34″);’> </td>
<td id=”35″ style=”background: #BB0044” onclick=’getColor(“35″);’> </td>
<td id=”36″ style=”background: #FF0044” onclick=’getColor(“36″);’> </td>
</tr>
<tr>
<td id=”37″ style=”background: #440088” onclick=’getColor(“37″);’> </td>
<td id=”38″ style=”background: #880088” onclick=’getColor(“38″);’> </td>
<td id=”39″ style=”background: #BB0088” onclick=’getColor(“39″);’> </td>
<td id=”40″ style=”background: #FF0088” onclick=’getColor(“40″);’> </td>
</tr>
<tr>
<td id=”41″ style=”background: #4400BB” onclick=’getColor(“41″);’> </td>
<td id=”42″ style=”background: #8800BB” onclick=’getColor(“42″);’> </td>
<td id=”43″ style=”background: #BB00BB” onclick=’getColor(“43″);’> </td>
<td id=”44″ style=”background: #FF00BB” onclick=’getColor(“44″);’> </td>
</tr>
<tr>
<td id=”45″ style=”background: #4400FF” onclick=’getColor(“45″);’> </td>
<td id=”46″ style=”background: #8800FF” onclick=’getColor(“46″);’> </td>
<td id=”47″ style=”background: #BB00FF” onclick=’getColor(“47″);’> </td>
<td id=”48″ style=”background: #FF00FF” onclick=’getColor(“48″);’> </td>
</tr>
<tr>
<td id=”49″ style=”background: #004444” onclick=’getColor(“49″);’> </td>
<td id=”50″ style=”background: #004488” onclick=’getColor(“50″);’> </td>
<td id=”51″ style=”background: #0044BB” onclick=’getColor(“51″);’> </td>
<td id=”52″ style=”background: #0044FF” onclick=’getColor(“52″);’> </td>
</tr>
<tr>
<td id=”53″ style=”background: #008844” onclick=’getColor(“53″);’> </td>
<td id=”54″ style=”background: #008888” onclick=’getColor(“54″);’> </td>
<td id=”55″ style=”background: #0088BB” onclick=’getColor(“55″);’> </td>
<td id=”56″ style=”background: #0088FF” onclick=’getColor(“56″);’> </td>
</tr>
<tr>
<td id=”57″ style=”background: #00BB44” onclick=’getColor(“57″);’> </td>
<td id=”58″ style=”background: #00BB88” onclick=’getColor(“58″);’> </td>
<td id=”59″ style=”background: #00BBBB” onclick=’getColor(“59″);’> </td>
<td id=”60″ style=”background: #00BBFF” onclick=’getColor(“60″);’> </td>
</tr>
<tr>
<td id=”61″ style=”background: #00FF44” onclick=’getColor(“61″);’> </td>
<td id=”62″ style=”background: #00FF88” onclick=’getColor(“62″);’> </td>
<td id=”63″ style=”background: #00FFBB” onclick=’getColor(“63″);’> </td>
<td id=”64″ style=”background: #00FFFF” onclick=’getColor(“64″);’> </td>
</tr>
<tr>
<td id=”65″ style=”background: #444444” onclick=’getColor(“65″);’> </td>
<td id=”66″ style=”background: #444488” onclick=’getColor(“66″);’> </td>
<td id=”67″ style=”background: #4444BB” onclick=’getColor(“67″);’> </td>
<td id=”68″ style=”background: #4444FF” onclick=’getColor(“68″);’> </td>
</tr>
<tr>
<td id=”69″ style=”background: #888844” onclick=’getColor(“69″);’> </td>
<td id=”70″ style=”background: #888888” onclick=’getColor(“70″);’> </td>
<td id=”71″ style=”background: #8888BB” onclick=’getColor(“71″);’> </td>
<td id=”72″ style=”background: #8888FF” onclick=’getColor(“72″);’> </td>
</tr>
<tr>
<td id=”73″ style=”background: #BBBB44” onclick=’getColor(“73″);’> </td>
<td id=”74″ style=”background: #BBBB88” onclick=’getColor(“74″);’> </td>
<td id=”75″ style=”background: #BBBBBB” onclick=’getColor(“75″);’> </td>
<td id=”76″ style=”background: #BBBBFF” onclick=’getColor(“76″);’> </td>
</tr>
<tr>
<td id=”77″ style=”background: #FFFF44” onclick=’getColor(“77″);’> </td>
<td id=”78″ style=”background: #FFFF88” onclick=’getColor(“78″);’> </td>
<td id=”79″ style=”background: #FFFFBB” onclick=’getColor(“79″);’> </td>
<td id=”80″ style=”background: #BBFFFF” onclick=’getColor(“80″);’> </td>
</tr>
<tr>
<td id=”81″ style=”background: #FFBB88” onclick=’getColor(“81″);’> </td>
<td id=”82″ style=”background: #FFBBFF” onclick=’getColor(“82″);’> </td>
<td id=”83″ style=”background: #88FFBB” onclick=’getColor(“83″);’> </td>
<td id=”84″ style=”background: #88FFFF” onclick=’getColor(“84″);’> </td>
</tr>
<td id=”85″ style=”background: #FFBBBB” onclick=’getColor(“85″);’> </td>
<td id=”86″ style=”background: #BBFFBB” onclick=’getColor(“86″);’> </td>
<td id=”87″ style=”background: #88BBFF” onclick=’getColor(“87″);’> </td>
<td id=”88″ style=”background: #88BBBB” onclick=’getColor(“88”);’> </td>
</tr>
<tr><td id = “colr” colspan=”4″> </td></tr>
</table>
<script type=’text/javascript’>
function getColor(lay) {
document.getElementById(“button”).innerHTML = “Close”;
document.getElementById(“colr”).style.backgroundColor = document.getElementById(lay).style.backgroundColor;
document.getElementById(“colr”).innerHTML = document.getElementById(lay).style.backgroundColor;
if (document.getElementById(“colr”).innerHTML.indexOf(“255, 255”) != -1 || document.getElementById(“colr”).innerHTML.indexOf(“255, 187”) != -1 || document.getElementById(“colr”).innerHTML.indexOf(“187, 255”) != -1 || document.getElementById(“colr”).innerHTML.indexOf(“255, 136”) != -1 || document.getElementById(“colr”).innerHTML.indexOf(“136, 255”) != -1 || document.getElementById(“colr”).innerHTML.indexOf(“, 255,”) != -1) {
document.getElementById(“colr”).style.color=”black”;
} else {
document.getElementById(“colr”).style.color=”white”;
}
}function showTable() {
if (document.getElementById(“button”).innerHTML == “Choose Color”) {
document.getElementById(“table1″).style.visibility=”visible”;
document.getElementById(“button”).innerHTML = “Close”;
} else {
document.getElementById(“table1″).style.visibility=”hidden”;
document.getElementById(“button”).innerHTML = “Choose Color”;
}
}
</script>
</body></html>


The Color Picker is based on a table, given an id and with the visibility set to hidden:

#table1{position: relative; padding:0; border: 1px solid white; empty-cells: show; background: black; visibility: hidden  }

Clicking the button makes the table visible and changes the heading of the button to Close, or if it already says Close, hides the table and changes the heading to Choose Color:

<button id=”button” name=”name” value=”ChooseColor” onclick=’showTable();’>Choose Color</button>

function showTable() {
if (document.getElementById(“button”).innerHTML == “Choose Color”) {
document.getElementById(“table1″).style.visibility=”visible”;
document.getElementById(“button”).innerHTML = “Close”;
} else {
document.getElementById(“table1″).style.visibility=”hidden”;
document.getElementById(“button”).innerHTML = “Choose Color”;
}
}

Clicking a color patch, inserts its value and changes the background to that of the color patch:

<td id=”85″ style=”background: #FFBBBB” onclick=’getColor(“85”);’> </td>

document.getElementById(“colr”).style.backgroundColor = document.getElementById(lay).style.backgroundColor;
document.getElementById(“colr”).innerHTML = document.getElementById(lay).style.backgroundColor;

Also, the text color is changed to make it more visible against the background:

if (document.getElementById(“colr”).innerHTML.indexOf(“255, 255”) != -1 || document.getElementById(“colr”).innerHTML.indexOf(“255, 187”) != -1 || document.getElementById(“colr”).innerHTML.indexOf(“187, 255”) != -1 || document.getElementById(“colr”).innerHTML.indexOf(“255, 136”) != -1 || document.getElementById(“colr”).innerHTML.indexOf(“136, 255”) != -1 || document.getElementById(“colr”).innerHTML.indexOf(“, 255,”) != -1) {
document.getElementById(“colr”).style.color=”black”;
} else {
document.getElementById(“colr”).style.color=”white”;
}

If you are interested in looking at the Color Picker, it can be downloaded from the following site

Click the Downloads menu item to get to the download page.

HTML Spreadsheet Update II

I have added three items to the online spreadsheet app, applying background colors to rows,  saving the sheets and exporting sheets as csv files.

Adding Row Background Colors

Click image for larger view

rowcolor

Here is the code:

function bk(rw) {
for (var i = 65; i <= 90; i ++) {
if (document.getElementById(“clr”).innerHTML != “Color”) {
document.getElementById(String.fromCharCode(i) + rw).style.backgroundColor = document.getElementById(“clr”).innerHTML;
colr[rw] = document.getElementById(“clr”).innerHTML;
if (i == 65) str1 = str1 + rw + “~” + colr[rw] + “~”;
}
}
}

If a color is entered, clicking a row number sets the background color for all cells in that row to the value entered. The last part is to create an array with the  background colors of the cells, so they can be saved and restored on reopening.

Saving and Reopening a Spreadsheet

Once again localStorage is used.

Here is the code to save:

function sve() {
var str = “”;
for (var i = 1; i <= 20; i++) {
for (var j = 1; j <=26; j++) {
str = str.replace(“<br>”, “”) + document.getElementById(String.fromCharCode(64 + j) +i).innerHTML + ” ~” ;
}
}

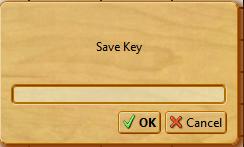
var savestr = prompt(“Save Key”, “”);
localStorage.setItem(savestr, str);
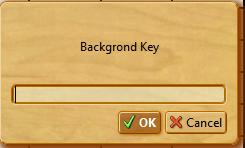
var bkstr = prompt(“Backgrond Key”, “”);
localStorage.setItem(bkstr,str1);
}

A ~ separated string is created with the text value of all cells and stored in a database chosen from a prompt dialog:

Click image for larger view

savekey

The string that was created from the row backgrounds is saved into another database chosen by a different prompt dialog:

Click image for larger view

bkkey

To reopen the spreadsheet the process is reversed. A blank sheet is opened on opening the file , the saved names are entered in the corresponding dialogs and the data and background rows are recreated.

function opn() {
var opnstr = prompt(“Open Key”, “”);
var recovstr = localStorage.getItem(opnstr);
for (var i = 1; i <= 20; i++) {
for (var j = 1; j <=26; j++) {
a = recovstr.indexOf(“~”);
document.getElementById(String.fromCharCode(64 + j) +i).innerHTML = recovstr.substring(0, a);
recovstr = recovstr.substring(a+1);
}
}

var bkopnstr = prompt(“Background Key”, “”);
var bkrecovstr = localStorage.getItem(bkopnstr);

var cnt2 = 1
for (var j = 1; j <=4; j++) {
if (j % 2 == 1 && j > 2 ) cnt2 ++;
a = bkrecovstr.indexOf(“~”);
if (j % 2 == 1) row[cnt2] = bkrecovstr.substring(0, a);
if (j%2 == 0) clor[cnt2] = bkrecovstr.substring(0, a);
bkrecovstr = bkrecovstr.substring(a+1);
}

for (var i = 1; i <= 20; i++) {

for (var j = 1; j <=26; j++) {
document.getElementById(String.fromCharCode(64 + j) +row[i]).style.backgroundColor = clor[i];
}
}

}

Exporting as CSV

Since an actual file will be created, this must be done through a small php file:

function csv() {
var str = “”;
for (var i = 1; i <= 20; i++) {
for (var j = 1; j <=26; j++) {
str = str.replace(“<br>”, “”) + document.getElementById(String.fromCharCode(64 + j) +i).innerHTML + ” ~” ;
}
}

window.location = “down-db.php?str=” + str;
}

A ~ delimited string with all the data is created and a file named down-db.php is opened:

<?php
if (stripos($_SERVER[‘HTTP_USER_AGENT’], ‘win’) !== FALSE) {
$string = “\r\n”;
} else {
$string = “\n”;
}
$a = 0;
if (isset($_GET[‘str’])) {
$str = str_replace(“<br>”, “”, $_GET[‘str’]);
$f = fopen (“phpdb.csv”, “w”);for ($t = 1; $t <= 520; $t ++) {
$a = strpos($str, “~”, $a+1);
if ($t == 26) {
fwrite($f,substr($str, 0, $a ) . $string);
$str = substr($str, $a );
$a = 0;
}if ($t == 52) {
fwrite($f,substr($str, 1, $a ) . $string);
$str = substr($str, $a);
$a = 0;
}

if ($t == 78) {
fwrite($f,substr($str, 1, $a ) . $string);
$str = substr($str, $a);
$a = 0;
}

if ($t == 104) {
fwrite($f,substr($str, 1, $a ) . $string);
$str = substr($str, $a);
$a = 0;
}

if ($t == 130) {
fwrite($f,substr($str, 1, $a ) . $string);
$str = substr($str, $a);
$a = 0;
}

if ($t == 156) {
fwrite($f,substr($str, 1, $a ) . $string);
$str = substr($str, $a);
$a = 0;
}

if ($t == 182) {
fwrite($f,substr($str, 1, $a ) . $string);
$str = substr($str, $a);
$a = 0;
}

if ($t == 208) {
fwrite($f,substr($str, 1, $a ) . $string);
$str = substr($str, $a);
$a = 0;
}

if ($t == 234) {
fwrite($f,substr($str, 1, $a ) . $string);
$str = substr($str, $a);
$a = 0;
}

if ($t == 260) {
fwrite($f,substr($str, 1, $a ) . $string);
$str = substr($str, $a);
$a = 0;
}

if ($t == 286) {
fwrite($f,substr($str, 1, $a ) . $string);
$str = substr($str, $a);
$a = 0;
}

if ($t == 312) {
fwrite($f,substr($str, 1, $a ) . $string);
$str = substr($str, $a);
$a = 0;
}

if ($t == 338) {
fwrite($f,substr($str, 1, $a ) . $string);
$str = substr($str, $a);
$a = 0;
}

if ($t == 364) {
fwrite($f,substr($str, 1, $a ) . $string);
$str = substr($str, $a);
$a = 0;
}

if ($t == 390) {
fwrite($f,substr($str, 1, $a ) . $string);
$str = substr($str, $a);
$a = 0;
}

if ($t == 416) {
fwrite($f,substr($str, 1, $a ) . $string);
$str = substr($str, $a);
$a = 0;
}

if ($t == 442) {
fwrite($f,substr($str, 1, $a ) . $string);
$str = substr($str, $a);
$a = 0;
}

if ($t == 468) {
fwrite($f,substr($str, 1, $a ) . $string);
$str = substr($str, $a);
$a = 0;
}

if ($t == 494) {
fwrite($f,substr($str, 1, $a ) . $string);
$str = substr($str, $a);
$a = 0;
}

if ($t == 520) {
fwrite($f, substr($str, 1, $a ));
}

}

fclose($f);

header(“Content-type: application/vnd.ms-excel”);
header(“Content-Disposition: attachment; filename=phpdb.csv”);
readfile($_SERVER[‘DOCUMENT_ROOT’] . ‘/phpdb.csv’);

}

?>

A file named phpdb.csv is opened in write mode, the string created previously is optained by means of the GET method. The string is then parsed for the ~ character and written to the file after each count of 26, together with a line feed:

if (stripos($_SERVER[‘HTTP_USER_AGENT’], ‘win’) !== FALSE) {
$string = “\r\n”;
} else {
$string = “\n”;
}

fwrite($f,substr($str, 0, $a ) . $string);
$str = substr($str, $a );

and the original string is decremented by that amount. That way each row of the data is  saved as a new line of text.

The file is then saved to your computer:

Click image for larger view

csv

The contents of phpdb.csv can then be imported into a spreadsheet application.

If you want to try this version of the online spreadsheet, go to this site, click the Downloads menu item and download spreadsheet5.zip